

Commentating a Game
This page is for studio operators. It covers what you need before a game and how to commentate it.
Before you start
Section titled “Before you start”How you get access
Section titled “How you get access”Your organisation administrator sets up your access: they invite you, enable the Studio permission for your account, and assign you as the studio operator for the games you will commentate. Those games then appear in your Studio games list.
If you can’t open Studio, or a game isn’t in your list, ask your administrator to check your access (see For Administrators).
Supported browsers
Section titled “Supported browsers”Studio runs in current versions of Google Chrome, Microsoft Edge, Safari, and Firefox.
Network
Section titled “Network”Studio sends a fixed ~4 Mbps video preview to you and carries your microphone upstream. Use a stable connection with at least 8 Mbps download and 2 Mbps upload.
Equipment
Section titled “Equipment”- A microphone: a headset or USB microphone gives better sound than a built-in laptop microphone.
- Headphones: required, so the game audio you monitor does not leak back into your microphone as an echo.
- A quiet room: background noise is broadcast along with your voice.
Final checks
Section titled “Final checks”- Confirm the game appears in your Studio games list (if not, contact your administrator).
- Connect your microphone and headphones, in a quiet room.
- Open the game a few minutes early and check your microphone.
- Open the game in one browser tab only.
1. Open the game
Section titled “1. Open the game”-
Sign in to Mismatch and open Studio from the main menu.
-
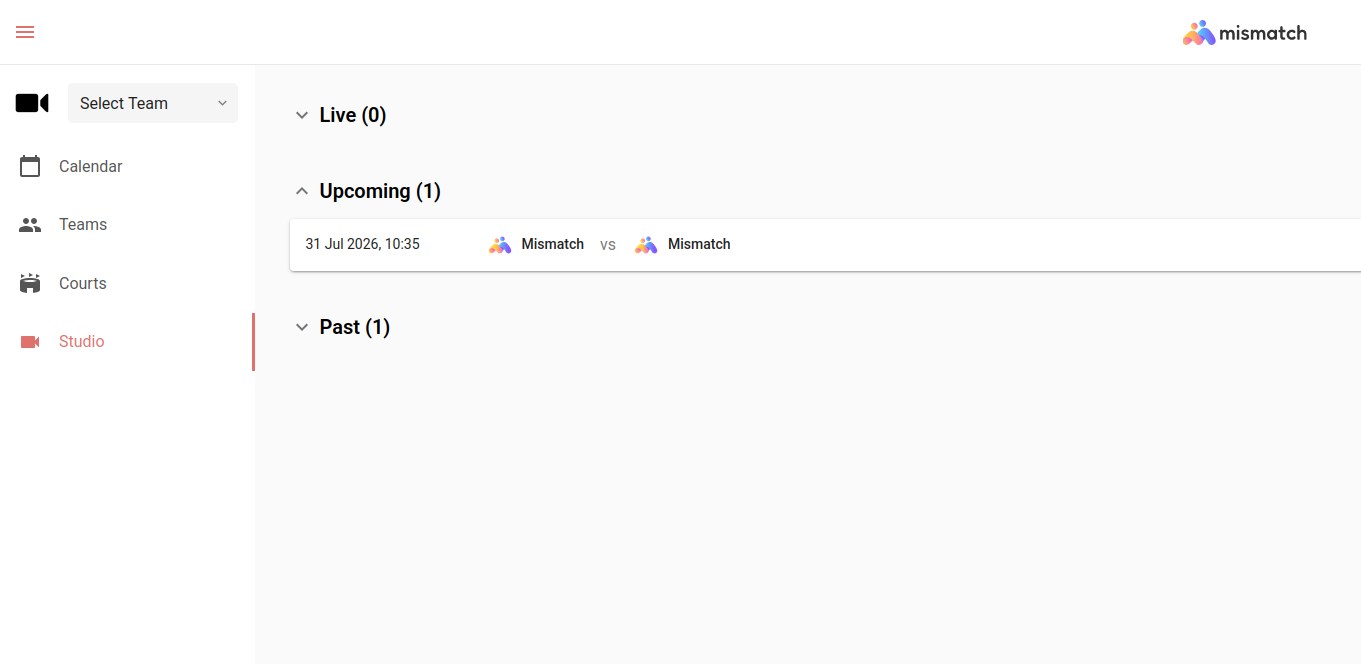
The Studio games list shows the games you are assigned to operate, grouped into Live, Upcoming, and Past.
-
Click a game in the Live group to open it. You can commentate a game once its stream is live, so a game stays in Upcoming until then.
The game opens in a full-screen view: the live video at the top with the game title, and a row of controls beneath it.
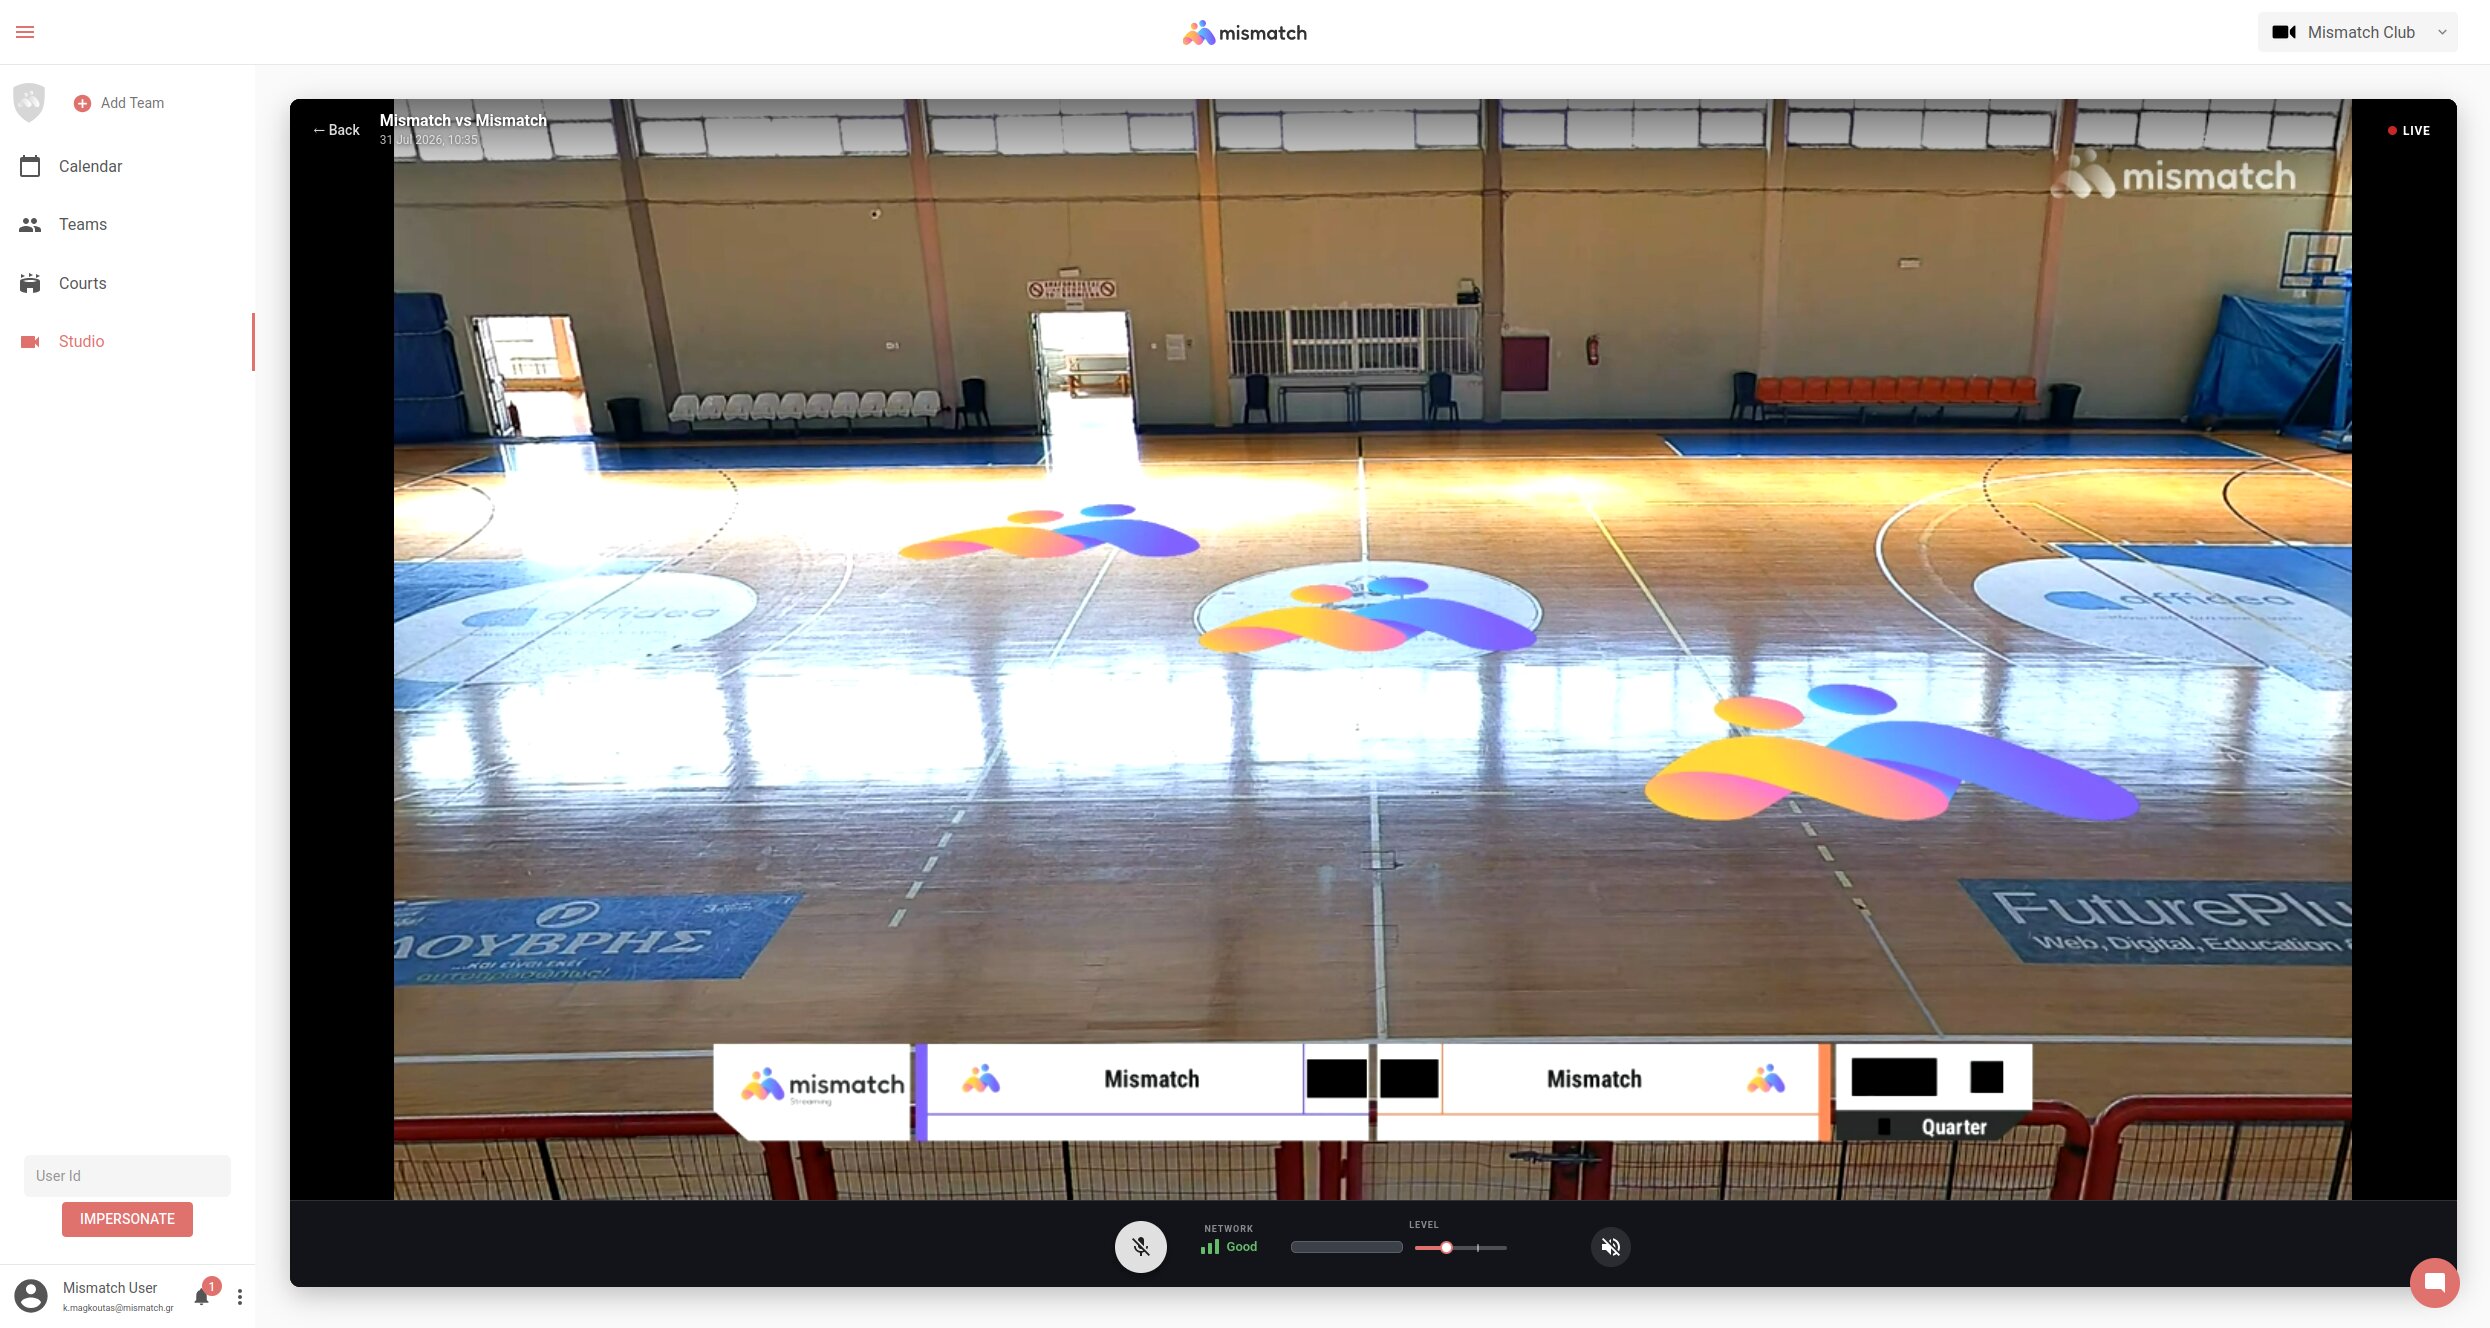
The control bar:

- Microphone button — click to go on air, click again to go off air. It turns solid and pulses while you are transmitting.
- Network indicator — shows Good, Weak, or Poor; expect occasional dropouts on Weak or Poor.
- Level meter — fills as you speak, showing your microphone’s input level.
- Volume slider — sets how loud you are in the broadcast mix. Its value is shown while you drag it, and dragging past 100 turns on Boost, which raises a quiet microphone but also amplifies background noise — use it only when needed.
- Speaker icon — mutes or unmutes the game audio for you only; it does not change what viewers hear.
2. Hear the game
Section titled “2. Hear the game”The preview starts muted. Click the speaker icon (5) in the control bar to unmute it. This audio is only for you; muting or unmuting it does not change what viewers hear.
3. Go on air
Section titled “3. Go on air”Click the microphone button (1) and confirm when prompted (once per session). The first time, your browser may also ask for microphone access — click Allow.
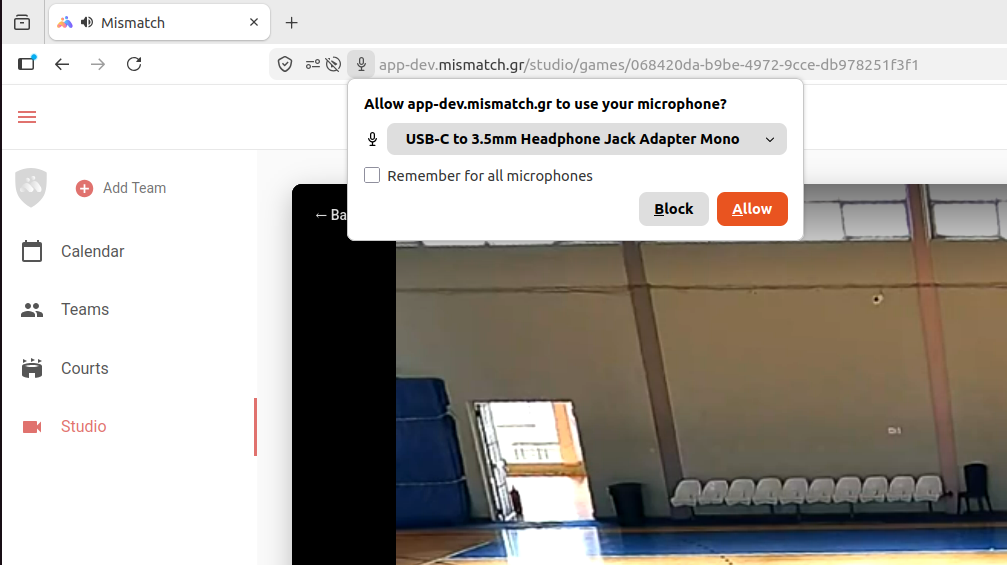
The button turns solid and pulses while you are transmitting; click it again at any time to go off air. While you speak, the court audio is automatically lowered and returns when you pause, and your commentary is kept in sync with the video, so no manual timing is required.
Check that you are being heard. Next to the microphone, a coloured ring and a word show whether your audio is reaching the broadcast:
| Ring colour and word | Meaning |
|---|---|
| Amber, Connecting… | You have gone on air; Studio is confirming your audio is getting through. |
| Green, On Air | Your audio is reaching listeners. |
| Red, Disconnected | Your microphone is on, but your audio is not reaching the broadcast (usually the network). |
If the status is red (Disconnected), toggle the microphone off and on, or refresh the page if it persists. See Troubleshooting.
4. Finishing
Section titled “4. Finishing”- Click the microphone button (1) to go off air.
- Close the tab when you are done. Ending your session does not stop the stream; the broadcast continues with the game’s own audio.